Vomit on Your Carpet? Quick and Easy Cleanup Hacks You Need to Know!

Accidents happen, and when they do, a vomit stain on your carpet can feel overwhelming. Vomit not only leaves a noticeable stain but can also result in unpleasant odors if not cleaned promptly. Luckily, with the right approach and a few household items, you can remove the mess effectively and restore your carpet. Follow these quick and easy hacks to clean up vomit from your carpet like a pro.

Why Vomit Stains Can Be Tricky

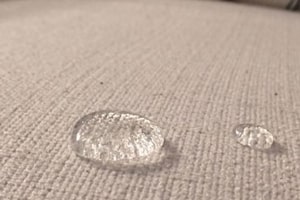
Vomit stains are tough because they often include acidic components that can damage carpet fibers if left untreated. Additionally, the lingering odor from the mess can settle into the fibers, making it even more important to act quickly. Immediate cleaning minimizes the risk of permanent damage and eliminates odors effectively.

Step-by-Step Guide to Clean Vomit from Carpet

1. Remove Solid Debris Immediately

  • Use a dustpan or scraper to lift any solid debris from the carpet.
  • Be gentle to avoid pushing the vomit deeper into the carpet fibers.
  • Wear gloves to protect your hands and ensure proper hygiene.

2. Blot the Area

  • Take a clean cloth or paper towels and blot the affected area.
  • Avoid rubbing the carpet, as it can spread the stain further.
  • Gently press to absorb as much liquid as possible before applying a cleaning solution.

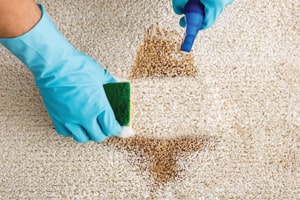
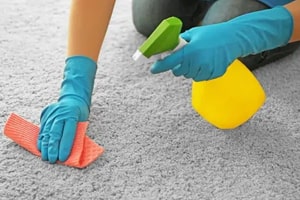
3. Create a Cleaning Solution

  • Mix one tablespoon of dish soap with two cups of warm water.
  • Add one tablespoon of white vinegar to the solution to neutralize odors.

4. Apply the Cleaning Solution

  • Dampen a sponge or cloth with the solution and gently dab the stain.
  • Work from the outer edges of the stain toward the center to prevent spreading.
  • Blot with a clean, dry towel to lift the stain and excess moisture.

5. Sprinkle Baking Soda

  • After cleaning, sprinkle a generous amount of baking soda over the area.
  • Baking soda absorbs any lingering moisture and neutralizes odors.
  • Let it sit for 15-20 minutes before vacuuming it up.
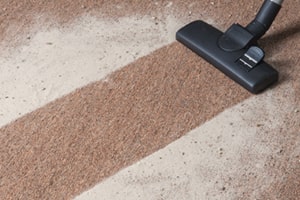
6. Rinse and Dry

  • Use a damp cloth to rinse the area with clean water, removing any soap or vinegar residue.
  • Blot the area with a dry towel or allow it to air dry completely.

Tips for Effective Vomit Stain Removal

  • Act Quickly: The sooner you address the mess, the easier it will be to remove both the stain and odor.
  • Avoid Harsh Chemicals: Stick to mild cleaning solutions to protect your carpet fibers.
  • Test Before Applying: Always test any cleaning solution on a small, inconspicuous area of your carpet to avoid discoloration.

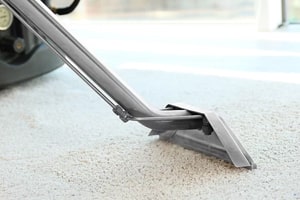
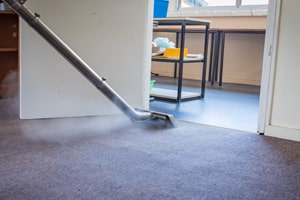
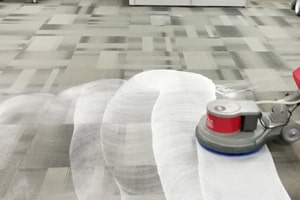
When to Call in Professional Carpet Cleaners

If the vomit stain persists or if the odor lingers despite your efforts, it’s time to seek professional help. Stain Removal Carpet Cleaning Sydney Experts have the tools and expertise to handle tough stains and odors effectively, leaving your carpet spotless and fresh.

Preventing Vomit Stains on Carpet

  • Prepare for Accidents: Keep essential cleaning supplies like gloves, paper towels, dish soap, vinegar, and baking soda on hand.
  • Use Protective Covers: For high-risk areas like children’s playrooms or pet zones, consider using carpet protectors or area rugs.
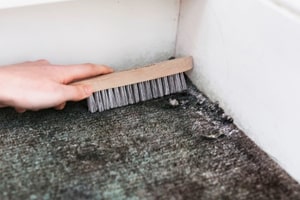
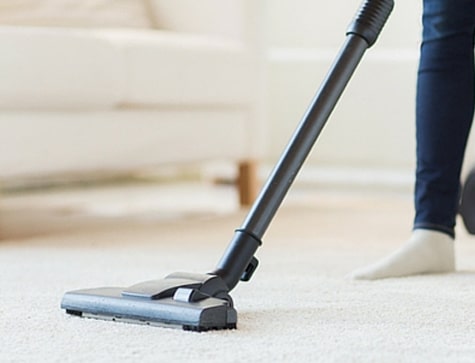
  • Clean Regularly: Routine Carpet Cleaning helps maintain your carpet’s appearance and reduces the impact of accidental stains.

Benefits of Professional Carpet Cleaning

  • Thorough Stain Removal: Experts use advanced techniques to remove even the toughest stains.
  • Odor Elimination: Professional cleaning ensures that no lingering odors remain after a spill.
  • Prolongs Carpet Lifespan: Regular professional cleaning protects your carpet fibers from wear and tear.

Quick Recap: Steps to Clean Vomit from Carpet

  1. Remove solid debris immediately to prevent it from settling into the carpet fibers.
  2. Blot the area gently to absorb excess liquid.
  3. Apply a dish soap and vinegar cleaning solution to lift the stain.
  4. Sprinkle baking soda to neutralize odors and absorb moisture.
  5. Rinse the area with clean water and blot it dry.
  6. Call professionals if the stain or odor persists.

Conclusion

Cleaning vomit from your carpet doesn’t have to be a daunting task. With quick action and the right cleaning methods, you can remove stains and odors effectively, keeping your carpet fresh and clean. For tougher stains or a deeper clean, trust Carpet Cleaning professionals to get the job done right. The Stain Removal Carpet Cleaning Sydney Experts are your go-to solution for restoring your carpet to its original condition, ensuring a spotless and odor-free home.

Published on: February 14, 2025

Foam couch cushions provide comfort and support, but over time, they can accumulate dirt, spills, and odours that diminish their appeal. Regular maintenance is essential to keep your cushions fresh, hygienic, and looking their best. Cleaning foam cushions may seem challenging, but with the right techniques, you can handle the task effectively at home. In this guide, we’ll walk you through the process of cleaning foam couch cushions and share tips for maintaining them in top condition.

1. Why Cleaning Foam Couch Cushions Is Important

Foam cushions are magnets for dirt, dust, and spills. Regular cleaning not only extends their lifespan but also improves the overall cleanliness of your living space.

Benefits of Cleaning Foam Cushions:

  • Removes dirt and allergens trapped in the foam.
  • Eliminates odours caused by spills, pets, or daily use.
  • Restores the cushion’s shape and comfort.

Whether you’re dealing with a specific stain or just want to refresh your cushions, proper cleaning techniques make all the difference.

2. Check the Care Label First

Before diving into cleaning, check the care label on your couch cushions. The label provides essential information about cleaning methods that are safe for the material.

Common Care Instructions:

  • Machine Washable: Some cushion covers can be removed and washed in a machine.
  • Hand Wash Only: For delicate fabrics or foam inserts, hand washing is recommended.
  • Dry Clean Only: If specified, take the cushions to a professional cleaner.

Always follow the manufacturer’s guidelines to avoid damaging your cushions.

3. Gather Your Cleaning Supplies

To clean foam couch cushions effectively, you’ll need the following supplies:

  • Mild detergent or upholstery cleaner.
  • A large tub or sink.
  • Warm water.
  • A soft sponge or cloth.
  • Towels for drying.
  • A vacuum cleaner with an upholstery attachment.

Having these items ready ensures a smooth and efficient cleaning process.

4. Step-by-Step Guide to Cleaning Foam Couch Cushions

Step 1: Remove the Covers

If your cushions have removable covers, unzip and take them off. Wash the covers separately according to the care label instructions.

Step 2: Vacuum the Foam

Use a vacuum cleaner with an upholstery attachment to remove dust, dirt, and debris from the foam cushions. This step is crucial for preparing the cushions for deeper cleaning.

Step 3: Soak the Foam Cushions

  • Fill a large tub or sink with warm water and add a small amount of mild detergent.
  • Submerge the foam cushions in the soapy water. Gently squeeze the cushions to help the detergent penetrate the foam and loosen dirt. Avoid scrubbing or wringing the foam, as this can damage its structure.

Step 4: Rinse Thoroughly

Drain the soapy water and refill the tub with clean water. Rinse the foam cushions by gently squeezing them to remove detergent residue. Repeat this step until the water runs clear.

Step 5: Remove Excess Water

After rinsing, press the cushions gently between your hands or against the tub’s side to remove excess water. Avoid twisting or wringing the foam, as this can cause it to lose its shape.

Step 6: Air Dry the Cushions

Place the foam cushions in a well-ventilated area to air dry. Lay them flat on a clean, dry towel and flip them occasionally to ensure even drying. Avoid using direct sunlight, as it may cause discolouration or shrinkage.

5. Cleaning the Covers

While the foam cushions dry, focus on the covers. Wash them according to the care label instructions. For machine-washable covers:

  • Use a gentle cycle with cold water and mild detergent.
  • Avoid bleach or harsh chemicals.
  • Air dry or tumble dry on low heat.

6. Deodorizing Foam Cushions

Foam cushions can absorb odours over time, especially in homes with pets or smokers. To remove odours effectively, consider professional Deep Deodorizing for Couch Near Me services. These services use advanced techniques to eliminate odours at their source, leaving your cushions smelling fresh.

For DIY deodorizing:

  • Sprinkle baking soda over the foam cushions and let it sit for 15–30 minutes.
  • Vacuum the baking soda thoroughly to remove any residue.

7. Tips for Maintaining Foam Couch Cushions

To keep your foam cushions clean and fresh, follow these maintenance tips:

  • Vacuum Weekly: Regular vacuuming prevents dirt and dust from embedding into the foam.
  • Spot Clean Spills Immediately: Blot spills with a clean cloth and use a mild detergent to treat stains.
  • Rotate Cushions: Flipping and rotating cushions evenly distribute wear and maintain their shape.
  • Use Protective Covers: Slipcovers or throws provide an extra layer of protection against spills and stains.

8. When to Call a Professional

While regular cleaning can handle everyday dirt and odours, professional couch cleaning services are recommended for:

  • Stubborn stains that don’t respond to DIY cleaning.
  • Deep cleaning foam cushions after prolonged use.
  • Restoring cushions damaged by water, mould, or mildew.

Professionals use specialised equipment and techniques to ensure your couch and cushions are thoroughly cleaned without damage.

Conclusion

Cleaning foam couch cushions doesn’t have to be a daunting task. With the right tools and techniques, you can keep your cushions looking and smelling fresh. Regular maintenance and proper care ensure your furniture remains comfortable and inviting for years to come. For tough stains or odours, professional couch cleaning services provide expert solutions to restore your cushions to their best condition.

FAQs About Foam Couch Cushion Cleaning

1. Can I machine wash foam couch cushions?

No, foam cushions should not be machine washed, as the agitation can damage their structure. Hand washing is the safest method.

2. How often should I clean my foam couch cushions?

Vacuum weekly and deep clean every 6–12 months, depending on usage.

3. Can I speed up the drying process for foam cushions?

Use fans or dehumidifiers to improve airflow, but avoid heat sources like dryers, which can damage the foam.

4. Are professional cleaning services worth it for foam cushions?

Yes, professional cleaning ensures thorough results, especially for odours and deep-set stains.

Published on: February 13, 2025

Curtains are an integral part of your home, adding elegance, warmth, and functionality. However, cleaning them is often overlooked until dust, stains, or allergens start to accumulate. While washing curtains might seem straightforward, certain common mistakes can lead to damage, discoloration, or even a shorter lifespan for your window treatments.

To help you avoid costly errors, we’ve compiled a list of five common curtain-washing mistakes and how to fix them. With these tips, your curtains will stay fresh, vibrant, and long-lasting.

Why Proper Curtain Cleaning Is Important

Cleaning curtains regularly offers numerous benefits:

  1. Maintains Appearance: Regular cleaning prevents dullness, discoloration, and stubborn stains.
  2. Promotes Healthier Living: Curtains trap dust, allergens, and pet dander, which can impact indoor air quality if not removed.
  3. Prolongs Lifespan: Proper care prevents fabric damage, ensuring your curtains last for years.
  4. Saves Money: Well-maintained curtains reduce the need for frequent replacements or costly professional services.

Mistake #1: Ignoring the Care Label

Every curtain comes with a care label that provides specific instructions for cleaning. Ignoring these guidelines can lead to shrinkage, fading, or permanent damage.

  • Why It’s a Mistake:
    • Certain fabrics, like silk, velvet, or lace, require gentle or professional cleaning.
    • Using the wrong cleaning method can compromise the texture and structure of the fabric.
  • How to Avoid It:
    • Always check the care label before cleaning.
    • If the label recommends “dry clean only,” avoid washing the curtains at home.

Mistake #2: Using Harsh Detergents

Using strong detergents might seem like an effective way to remove stains, but they can damage delicate fabrics and leave behind residue.

  • Why It’s a Mistake:
    • Harsh chemicals can weaken fabric fibers, cause discoloration, and leave soap residue.
    • Bleach can strip the natural vibrancy of the fabric.
  • How to Avoid It:
    • Use a mild detergent specifically designed for delicate fabrics.
    • For tough stains, spot-treat using a diluted detergent or natural solutions like baking soda and vinegar.

Mistake #3: Overwashing Curtains

Overwashing can weaken fabric fibers and accelerate fading, especially for curtains made of natural or brightly colored materials.

  • Why It’s a Mistake:
    • Frequent washing can cause wear and tear, reducing the lifespan of your curtains.
    • Overexposure to water can damage linings and embellishments.
  • How to Avoid It:
    • Dust or vacuum your curtains weekly to minimize the need for frequent washing.
    • Wash or dry clean them only once every 6–12 months, depending on the level of dirt and exposure.

Mistake #4: Neglecting to Remove Hardware

Washing curtains with attached hooks, rings, or grommets can damage both the fabric and your washing machine.

  • Why It’s a Mistake:
    • Metal parts can rust or tear the fabric during the washing process.
    • Hardware can scratch or dent your washing machine drum.
  • How to Avoid It:
    • Remove all hardware, such as hooks, rings, or tiebacks, before washing.
    • Place delicate curtains in a mesh laundry bag for added protection.

Mistake #5: Using the Wrong Drying Method

How you dry your curtains is just as important as how you wash them. Incorrect drying can cause wrinkles, shrinkage, or fading.

  • Why It’s a Mistake:
    • Using a dryer on high heat can shrink or warp delicate fabrics.
    • Hanging damp curtains in direct sunlight can cause fading or discoloration.
  • How to Avoid It:
    • Air dry your curtains on a sturdy rod or clothesline in a shaded, well-ventilated area.
    • For thicker fabrics, lay them flat on a clean surface to prevent stretching or sagging.

Tips for Proper Curtain Maintenance

  1. Vacuum Regularly: Use a vacuum cleaner with a soft brush attachment to remove dust and allergens weekly.
  2. Spot Clean Promptly: Address spills or stains immediately with a damp cloth and mild detergent.
  3. Steam Clean Periodically: Use a handheld steamer to refresh curtains between washes, especially for heavy or non-washable fabrics.
  4. Invest in Professional Help: For delicate or heavily soiled curtains, consider hiring local curtain cleaners near Sydney for safe and effective cleaning.

Benefits of Avoiding Common Mistakes

  1. Preserves Fabric Quality: Proper care ensures the texture and color of your curtains remain intact.
  2. Improves Air Quality: Regular cleaning eliminates allergens and dust, creating a healthier home.
  3. Extends Lifespan: Following care instructions helps your curtains stay functional and attractive for years.
  4. Saves Time and Money: Avoiding mistakes minimizes the need for frequent replacements or extensive repairs.

When to Seek Professional Help

While DIY cleaning works for many fabrics, some situations call for professional assistance:

  • Curtains with heavy stains, mold, or mildew.
  • Fabrics that are labeled “dry clean only.”
  • High-value or sentimental curtains that require expert handling.

Professional Cleaning services use specialized tools and techniques to safely and effectively clean your curtains without risking damage.

Conclusion

Curtain cleaning doesn’t have to be daunting, but it’s important to avoid common mistakes that can damage your window treatments. By paying attention to care labels, using mild detergents, and adopting proper washing and drying methods, you can keep your curtains looking fresh and beautiful for years to come.

For delicate fabrics or situations requiring expert care, professional cleaning services are always a great option. By incorporating these tips into your routine, you’ll enjoy clean, vibrant curtains that enhance your home’s aesthetic and comfort.

Published on: February 12, 2025

When your home is affected by water, it’s important to understand the type of damage you’re dealing with. Water damage and flood damage are often used interchangeably, but they have key differences that can affect your approach to restoration and insurance claims. Knowing the distinctions between water damage and flood damage can help you respond appropriately and make informed decisions about the necessary Flood Damage Restoration services.

What Is Water Damage?

Water damage refers to the harm caused by water from any source that has infiltrated your property. This could be from a leaking roof, a broken appliance, burst pipes, or even a sewage backup. Water damage may range from mild to severe and can affect areas of your home such as walls, floors, ceilings, and furniture.

Water damage typically occurs as a result of internal sources such as:

  • Leaking faucets or pipes
  • Broken dishwashers or washing machines
  • Overflowing sinks or toilets
  • Roof leaks from heavy rain or snow

What Is Flood Damage?

Flood damage, on the other hand, refers to the destruction caused by water originating from an external source, typically from the overflowing of rivers, lakes, or from torrential rains that overwhelm drainage systems. Unlike water damage, flood damage is usually more extensive and can affect larger areas of a home.

Flood damage is often associated with natural disasters, and the water is typically more contaminated with debris, chemicals, and sometimes even sewage. The effects of flood damage can be devastating and require more extensive cleanup and Restoration efforts.

Key Differences Between Water Damage and Flood Damage

1. Source of the Water

  • Water Damage: This can come from any internal source within the home, like a burst pipe, an appliance malfunction, or a leaky roof.
  • Flood Damage: This comes from external sources such as heavy rains, rising rivers, or overflowing lakes.

2. Extent of Damage

  • Water Damage: Water damage is often localized to specific areas of the home, such as a bathroom, basement, or kitchen.
  • Flood Damage: Flood damage tends to affect larger areas of a home, including multiple rooms or even the entire house, as floodwater typically covers much more ground.

3. Severity and Cleanup

  • Water Damage: While water damage can be significant, it is often easier to clean up and address, especially if caught early. Professional Damage Restoration services may still be needed, depending on the extent of the damage.
  • Flood Damage: Flood damage is usually more severe and requires extensive restoration. The cleanup involves removing large amounts of contaminated water, drying out structures, repairing structural damage, and potentially dealing with mold growth.

4. Insurance Coverage

  • Water Damage: Standard homeowner’s insurance typically covers water damage caused by internal sources, such as burst pipes or leaking appliances. However, damage from water entering from the outside (like through a window during a storm) may not be covered.
  • Flood Damage: Flood damage is typically not covered under standard homeowner’s insurance policies. Flood insurance is usually a separate policy that homeowners must purchase to be covered in case of flooding due to heavy rains or natural disasters.

How to Handle Water and Flood Damage

Handling Water Damage: DIY vs. Professional Help

For smaller cases of water damage, you may be able to take action on your own, especially if the source of water has already been fixed. Here are a few steps you can take:

  • Turn off the water supply if the source is still active.
  • Use towels, mops, or a wet/dry vacuum to remove the water.
  • Dry affected areas using fans, dehumidifiers, or open windows to promote airflow.
  • Clean and disinfect the area to prevent mold growth.

However, for more significant water damage, you should contact a professional Flood Damage Restoration team to properly dry, clean, and restore the affected areas.

Handling Flood Damage: Professional Help Is Essential

Flood damage often requires immediate professional assistance due to the severity and complexity of the restoration process. If you’ve experienced flood damage, professionals can:

  • Use industrial equipment to remove water quickly.
  • Dry out affected structures and prevent mold growth.
  • Sanitize the affected areas to eliminate contaminants.
  • Repair structural damage and restore your home to its pre-flood condition.

Contact Us

If your home has been affected by water or flood damage, don’t wait to take action. Our team specializes in Flood Damage Restoration in Sydney to ensure your property is restored quickly and efficiently. Contact us today for a consultation and take the first step toward recovery.

In conclusion, while both water and flood damage require timely action, understanding the differences between them can help you approach restoration with the right mindset. Whether dealing with a leaky pipe or recovering from a natural disaster, acting swiftly and consulting the right professionals will ensure your home is protected and restored.

FAQs About Water and Flood Damage

Q1: Can I fix water damage on my own?

Minor water damage can often be fixed with DIY methods, but for extensive damage or flood-like conditions, it’s best to call in a professional Flood Damage Restoration service.

Q2: How can I tell if my damage is covered by insurance?

Review your policy for details on coverage for water damage. For flood damage, you will likely need separate flood insurance. Consult with your insurance provider to understand your coverage.

Q3: How do I prevent water damage in the future?

Regularly inspect your plumbing, roof, and appliances. Install sump pumps in flood-prone areas and seal any cracks or openings in your home.

Q4: Can mold grow after water damage?

Yes, mold can begin to grow within 24-48 hours if the area remains damp. Fast water removal and drying are crucial to preventing mold growth.

Q5: Is water damage always worse than flood damage?

Not necessarily. While flood damage can be more widespread and involve contaminated water, water damage from an internal source can be severe, depending on the extent of the leak and the delay in fixing the problem.

Published on: February 11, 2025

A mattress protector is your first line of defense against spills, allergens, and dirt, keeping your mattress clean and extending its lifespan. However, over time, your mattress protector can accumulate dust, sweat, and stains, reducing its effectiveness. Washing it regularly is essential to ensure a healthy and hygienic sleep environment. This guide will provide simple and effective steps to wash your mattress protector without compromising its quality.

Why Washing Your Mattress Protector Is Important

Your mattress protector absorbs sweat, body oils, and accidental spills, which can lead to unpleasant odors and bacteria buildup. Regular cleaning prevents allergens and dust mites from accumulating, ensuring better sleep hygiene. Incorporating mattress cleaning into your routine will not only keep your protector fresh but also protect your mattress for years to come.

How Often Should You Wash a Mattress Protector?

The frequency of washing your mattress protector depends on your lifestyle and specific needs:

  • Every 2–3 months: For general maintenance in a clean environment.
  • Monthly: If you have allergies, sweat excessively, or allow pets on your bed.
  • After spills or accidents: Wash immediately to prevent stains and odors from setting in.

Step-by-Step Guide to Washing Your Mattress Protector

1. Read the Care Label

Before washing, check the care label on your mattress protector. Some protectors are machine washable, while others may require hand washing. The label will also specify the recommended water temperature and cleaning agents.

2. Pre-Treat Stains

For visible stains or spills:

  • Apply a stain remover or a mixture of mild detergent and water directly to the stained area.
  • Let it sit for 10–15 minutes before washing.

3. Choose the Right Washing Cycle

  • Use a gentle cycle on your washing machine to prevent wear and tear.
  • Wash with cold or lukewarm water to protect the waterproof membrane and elastic components.
  • Avoid using hot water, as it can damage the protector’s material.

4. Use a Mild Detergent

  • Opt for a mild, fragrance-free detergent to avoid irritating your skin or compromising the protector’s fabric.
  • Avoid bleach and fabric softeners, as they can break down the waterproof layer and reduce the protector’s durability.

5. Rinse Thoroughly

Ensure the detergent is fully rinsed out to prevent residue buildup, which can affect the protector’s breathability and comfort.

6. Dry Properly

  • Air-drying is the safest method to preserve the protector’s material. Hang it on a clothesline or lay it flat in a well-ventilated area.
  • If machine drying is allowed, use a low-heat or tumble-dry setting to prevent shrinkage or damage to the waterproof layer.
  • Avoid high heat, as it can weaken the fabric and reduce the protector’s lifespan.

Special Care Tips for Different Types of Mattress Protectors

  • Waterproof Protectors: Handle with care to avoid damaging the waterproof layer. Avoid wringing or twisting the fabric during washing or drying.
  • Quilted Protectors: Use a delicate cycle to protect the stitching and padding.
  • Allergy-Proof Protectors: Wash more frequently to remove allergens and dust mites.
  • Fitted vs. Encasement Protectors: For encasement styles, unzip and clean both sides thoroughly.

Preventing Buildup Between Washes

To maintain your mattress protector between washes:

  • Vacuum Regularly: Use a handheld vacuum to remove dust and debris from the protector’s surface.
  • Spot Clean Small Spills: Address minor stains immediately with a damp cloth and mild soap.
  • Rotate Your Protector: If it’s reversible, flip it regularly to prevent uneven wear.

Why Mattress Cleaning Complements a Clean Protector

A clean mattress protector works hand-in-hand with regular mattress cleaning to provide a hygienic sleeping environment. While protectors shield your mattress from spills and dirt, professional cleaning ensures the mattress itself remains fresh and allergen-free. For deeper cleaning needs, consider Affordable Mattress Cleaning in Sydney to keep your mattress in top condition.

Benefits of Washing Your Mattress Protector

  • Improved Sleep Hygiene: Removes allergens, bacteria, and odors.
  • Prolonged Lifespan: Maintains the protector’s effectiveness over time.
  • Better Protection for Your Mattress: Prevents dirt and stains from reaching the mattress.
  • Enhanced Comfort: Keeps your sleep environment fresh and breathable.

Conclusion

Washing your mattress protector regularly is essential to ensure a clean and healthy sleep environment. By following these simple steps and using the right techniques, you can maintain your protector’s effectiveness and prolong its lifespan. Combine this practice with regular mattress cleaning to create a complete hygiene routine. For professional-grade care, trust Affordable Mattress Cleaning to keep your mattress and protector in top shape.

Published on: February 10, 2025

Rugs are an investment in your home’s style and comfort, but without proper care, they can wear out faster than expected. One of the simplest yet most effective ways to extend the life of your rugs is by using a rug pad. Rug pads offer more than just cushioning—they protect your rugs, floors, and even improve safety in your home.

This article explores how rug pads work, their benefits, and the best practices for using them to keep your rugs looking beautiful for years.

Why Rug Pads Are Essential

Rug pads are often overlooked, but they play a vital role in preserving your rugs and enhancing their functionality. Here’s why every rug in your home needs one:

  1. Prevents Wear and Tear: Rug pads act as a buffer between your rug and the floor, reducing friction and preventing premature wear.
  2. Improves Safety: A rug pad keeps your rug in place, preventing slipping and sliding that could lead to accidents.
  3. Protects Your Flooring: Rug pads prevent scratches, discoloration, and damage to your flooring caused by rough rug backing.
  4. Enhances Comfort: The extra cushioning adds a layer of softness, making your rug feel plush underfoot.

1. Choose the Right Rug Pad for Your Needs

Not all rug pads are created equal. The type of rug pad you choose should depend on your rug’s material, size, and the type of flooring beneath it.

  • For Hardwood Floors: Opt for a felt-and-rubber combination pad. The felt provides cushioning, while the rubber ensures the rug stays in place without damaging the floor.
  • For Carpeted Floors: Use a rug pad with a grippy surface to prevent the rug from shifting on the carpet.
  • For Thin Rugs: Choose a low-profile pad that doesn’t add bulk but still provides a non-slip surface.
  • For Outdoor Rugs: Look for pads designed to withstand moisture and outdoor conditions.

2. Match the Pad Size to Your Rug

A properly sized rug pad is essential for maximum effectiveness. The pad should be slightly smaller than the rug, leaving about an inch of space on all sides. This prevents the pad from peeking out and ensures the edges of the rug lay flat.

Pro Tip: If you can’t find a pad that fits perfectly, buy a larger one and trim it down to size with scissors.

3. Reduce Friction and Prevent Fiber Damage

Rugs without a pad are more susceptible to friction caused by foot traffic. Over time, this friction wears down the rug fibers, leading to thinning and loss of texture.

Why It Matters: Rug pads absorb the impact of footsteps, reducing stress on the rug fibers and preserving their quality.

4. Protect Your Floors from Rug Backing

The backing of some rugs, especially synthetic ones, can scratch or discolor certain types of flooring. A rug pad creates a protective barrier that prevents direct contact between the rug and the floor.

Pro Tip: Ensure the rug pad is made from materials safe for your flooring type, such as natural rubber for hardwood floors.

5. Prevent Slipping and Sliding

One of the most practical benefits of a rug pad is its ability to keep your rug in place. Sliding rugs are not only annoying but also a safety hazard, especially in homes with children or elderly family members.

Why It Matters: A non-slip rug pad keeps your rug secure, reducing the risk of trips and falls.

6. Enhance Comfort and Insulation

Rug pads add an extra layer of cushioning, making your rug more comfortable to walk on. They also provide insulation, keeping your floors warmer during colder months and helping with sound absorption.

Pro Tip: For maximum comfort, choose a thicker rug pad, especially for living rooms or bedrooms.

7. Improve Rug Cleaning Efficiency

A rug pad lifts your rug slightly off the floor, improving air circulation underneath. This makes vacuuming more effective, as dirt and debris are less likely to become trapped between the rug and the floor.

Why It Matters: A clean rug lasts longer, and regular rug cleaning is easier when dirt isn’t deeply embedded.

8. Replace Rug Pads When Needed

Rug pads don’t last forever. Over time, they may lose their grip, cushioning, or protective qualities. Inspect your rug pads regularly and replace them when they show signs of wear, such as cracking, flattening, or slipping.

Pro Tip: High-quality rug pads typically last 3-5 years, depending on usage and material.

Why Professional Rug Cleaning Matters

While rug pads do an excellent job of protecting your rugs and floors, they can’t remove dirt, stains, or odors. Regular professional rug cleaning ensures your rugs remain fresh and vibrant. If you’re looking for a reliable service, search for rug cleaning near me to find trusted professionals in your area.

Conclusion

Rug pads are a simple yet powerful tool for extending the life of your rugs. They prevent wear and tear, protect your floors, and make your home safer and more comfortable. By choosing the right pad for your rug and flooring type, you can enhance your rug’s functionality and preserve its beauty for years.

Combined with regular maintenance and professional cleaning, rug pads ensure your rugs remain a valuable and lasting part of your home’s décor. Don’t underestimate the difference a quality rug pad can make—it’s an investment in both your rug’s longevity and your home’s safety.

Published on: February 8, 2025

Keeping your pool tiles clean is crucial for maintaining the aesthetic appeal and overall hygiene of your swimming pool. Over time, pool tiles can accumulate grime, algae, calcium deposits, and scale, all of which can dull the appearance of your tiles and affect the water quality. Regular cleaning is essential to ensure your pool remains inviting and clean.

Why Pool Tile Cleaning Is Important

Pool tiles are exposed to a variety of contaminants, including:

  • Chlorine: The chemicals used to treat pool water can cause buildup on tiles.
  • Calcium Deposits: Hard water can leave white, chalky deposits on the tiles.
  • Algae and Mold: Algae and mold can grow on the tiles, especially in shaded or damp areas.
  • Grime and Dirt: Dirt, sunscreen, and body oils can accumulate on the tiles over time.

Regular cleaning prevents these issues from building up and helps to preserve the life of your tiles. Keeping your pool tiles clean also enhances the beauty of your pool area, making it a more enjoyable space to relax and swim.

Expert Tips for Cleaning Pool Tiles

1. Regular Brushing

  • Why It Works: Regular brushing is one of the easiest ways to keep your pool tiles free from grime and buildup. A soft-bristled brush is perfect for removing light dirt and debris from the surface.
  • How to Do It: Use a long-handled pool brush and gently scrub the tiles, paying special attention to the grout lines. Brush along the tile’s surface and the edges of the pool to prevent buildup from accumulating in these areas.

2. Use a Vinegar Solution for Light Cleaning

  • Why It Works: Vinegar is an effective and natural cleaner that can help dissolve light calcium buildup and grime. It’s also safe for most tile types, including ceramic and porcelain.
  • How to Do It: Mix equal parts white vinegar and water in a spray bottle. Spray the solution on the affected tiles, let it sit for a few minutes, and then scrub with a soft brush. Afterward, rinse with clean water to remove the vinegar solution.

3. Remove Calcium Deposits with a Pumice Stone

  • Why It Works: Calcium deposits, or scale, can build up on pool tiles over time, especially in areas with hard water. Pumice stones are a great way to scrub off these tough deposits without damaging the tiles.
  • How to Do It: Wet the pumice stone and gently rub it against the calcium deposits. Always keep the stone and tiles wet to avoid scratching the surface. For larger deposits, you may need to scrub a little harder, but always do so gently.

4. Use a Pool Tile Cleaner for Stubborn Grime

  • Why It Works: For tougher stains, grime, or calcium buildup, using a commercial pool tile cleaner can help. These cleaners are specifically designed to remove scale and algae without harming your tiles.
  • How to Do It: Apply the pool tile cleaner as per the manufacturer’s instructions. Usually, you’ll need to spray the cleaner onto the tiles, let it sit for a few minutes, and then scrub with a soft brush. Rinse the area thoroughly to remove any residue.

5. Address Algae and Mold Growth

  • Why It Works: Algae and mold can grow on tiles, especially in areas of the pool that receive little sunlight or aren’t frequently used. These contaminants can create slippery spots and affect the overall cleanliness of the pool.
  • How to Do It: Use a specialized algae and mold remover. These are typically available in pool supply stores and are safe for most pool tiles. Apply the product according to the manufacturer’s instructions and scrub the affected areas. For larger mold issues, you may want to consider hiring a professional service.

6. Preventative Maintenance: Keep Pool Water Balanced

  • Why It Works: The quality of your pool water plays a significant role in the cleanliness of your tiles. If the water is too acidic or has high calcium levels, it can lead to accelerated buildup on the tiles.
  • How to Do It: Regularly check the chemical balance of your pool water, ensuring that the pH, alkalinity, and calcium hardness are all within the recommended ranges. You can use a pool water testing kit to monitor these levels and make adjustments as necessary.

When to Call for Professional Help

While regular cleaning can help maintain your pool tiles, there are times when professional cleaning services are needed:

  • Stubborn Scale or Stains: If you’re unable to remove stubborn calcium buildup or stains, professionals can use specialized equipment to deep clean your tiles.
  • Algae or Mold Problems: Persistent algae or mold issues may require a more thorough cleaning than what DIY methods can achieve.
  • Emergency Cleaning: If you need urgent cleaning, consider searching for Emergency Tile Cleaning Near Me to get quick, professional assistance for your pool tiles.

Conclusion

Maintaining sparkling clean pool tiles is crucial for both the aesthetics and hygiene of your swimming pool. Regular brushing, using the right cleaning solutions, and addressing stains and buildup promptly will help you keep your tiles looking great year-round. For tough cleaning challenges, don’t hesitate to contact professionals for tile cleaning or emergency tile cleaning for a deeper clean and restoration. With the right care, your pool tiles will continue to shine, making your pool a relaxing and inviting space.

Published on: January 31, 2025

Carpet damage can happen in an instant—a spill, a burn, or even a pet’s playful mischief. Thankfully, carpet patching offers a quick and effective solution to restore your flooring without needing a full replacement. But have you ever wondered where the patch comes from or how professionals ensure it blends seamlessly with your existing carpet? This article dives into the secrets of carpet patching and highlights the importance of expert carpet repair services.

What Is Carpet Patching?

Carpet patching is a specialized technique used to replace small damaged sections of a carpet. A matching piece of carpet is carefully cut and installed in place of the damaged area, creating a virtually invisible repair. This method is cost-effective, efficient, and perfect for localized damage.

Where Does the Patch Come From?

When repairing a carpet, the replacement patch needs to match the existing one as closely as possible. Here’s where professionals source the patch:

1. Extra Carpet Leftover from Installation

The best source for a matching patch is leftover carpet from the original installation. If you have remnants stored, these can be used to create a seamless repair. Always save extra pieces of your carpet when it’s installed—it can be invaluable for future repairs.

2. Closet or Hidden Areas

If no extra carpet is available, professionals may cut a small piece from a less noticeable area, such as inside a closet or under furniture. This method ensures a perfect match while leaving your visible carpet areas looking flawless.

3. Matching from Retail or Online Sources

In cases where no extra carpet or hidden areas are available, professionals may source a matching piece from retailers or online stores. While finding an exact match can be challenging, experienced technicians know how to blend similar shades and textures for a polished finish.

4. Custom Dyeing

For unique or rare carpets, custom dyeing might be used to create a patch that matches the existing color and pattern. This option is less common but highly effective for high-end or specialty carpets.

The Carpet Patching Process

Here’s how professionals carry out a seamless carpet patching repair:

  1. Assessing the Damage
    The damaged area is carefully examined to determine the size and scope of the patch needed.
  2. Selecting the Patch
    A matching piece of carpet is chosen from one of the sources mentioned above.
  3. Cutting the Damaged Section
    The damaged area is cut out precisely, creating a clean space for the replacement patch.
  4. Preparing the Patch
    The patch is cut to match the size and shape of the removed section, ensuring a snug fit.
  5. Installing the Patch
    Using adhesives or a seam tape, the patch is securely installed. Professionals align the fibers and seams to create a seamless look.
  6. Blending and Final Touches
    The repaired area is groomed to blend the patch with the surrounding carpet, making it virtually invisible.

Benefits of Professional Carpet Repair

While DIY carpet patching kits are available, hiring a professional ensures superior results. Here’s why:

  • Expertise in Matching: Professionals have the skills to find or create a patch that matches your carpet perfectly.
  • Specialized Tools: From seam rollers to adhesives, experts use advanced tools for precision repairs.
  • Durability: A professionally installed patch lasts longer and withstands daily wear and tear.
  • Time-Saving: Professionals complete the repair quickly and efficiently, saving you time and frustration.

Contact Us

Do you have damaged carpet in need of repair? Our expert team specializes in carpet repair and professional carpet patch services in Sydney, providing seamless solutions to restore your flooring’s beauty and functionality. Contact us today for a consultation and let us help you bring your carpet back to life!

Carpet patching is a practical and cost-effective solution to extend the life of your flooring. Whether you’re dealing with burns, stains, or tears, knowing where the patch comes from and how the process works can help you make informed decisions. Trust the experts for flawless results, and enjoy a beautiful, damage-free carpet once again!

FAQs

1. Can I patch my carpet myself?

While DIY kits are available, achieving a seamless repair is challenging without experience. Professional carpet repair ensures a flawless finish.

2. Will the patch be visible?

When done by a skilled professional, the patch should blend seamlessly with the surrounding carpet and be nearly invisible.

3. How long does carpet patching take?

Most carpet patching jobs take 1-2 hours, depending on the size and complexity of the damage.

4. Is carpet patching a permanent solution?

Yes, a well-installed patch can last for years, especially if the carpet is maintained properly.

Published on: January 29, 2025

A professional cleaning can breathe new life into your carpets, restoring their fresh appearance and removing embedded dirt, allergens, and bacteria. To maximise the benefits of this deep cleaning, it’s important to follow specific steps to maintain your carpets in their best condition. By adopting these tips, you can extend the lifespan of your carpets and keep them looking immaculate long after the cleaning service.

1. Allow Carpets to Dry Properly

After a professional carpet cleaning, it’s crucial to allow sufficient drying time before walking on the carpets or replacing furniture. Carpets typically take 6–12 hours to dry completely, depending on the cleaning method, room ventilation, and humidity. Walking on damp carpets can lead to footprints or transfer dirt onto the surface, undermining the cleaning results. If you need to step on the carpet during this period, wear clean socks or use shoe covers. Additionally, open windows and use fans to improve air circulation and speed up the drying process.

2. Vacuum Regularly

Vacuuming is one of the simplest yet most effective ways to maintain the cleanliness of your carpets after a professional clean. Regular vacuuming removes surface dust, dirt, and debris that accumulate daily, preventing them from settling deeper into the fibres. Aim to vacuum at least twice a week and focus on high-traffic areas where dirt tends to accumulate more quickly. This practice helps preserve the fresh look of your carpets and reduces the need for frequent deep cleaning.

3. Use Doormats and Rugs

Protecting your carpets from dirt starts at the entrance. Place durable doormats at all entry points to catch dirt, mud, and debris before they are tracked onto your carpets. Encourage family members and visitors to wipe their shoes on the mats. For added protection, consider using area rugs or runners in high-traffic areas like hallways, living rooms, and staircases. These provide a buffer against daily wear and can be easily cleaned or replaced when needed.

4. Enforce a No-Shoes Policy

Shoes are a significant source of dirt, oils, and other contaminants that can quickly soil carpets. Implementing a no-shoes policy in your home is an effective way to maintain the cleanliness of your carpets. Create a designated space near the entrance for shoe storage and provide comfortable indoor slippers or socks as an alternative. This simple measure goes a long way in preserving the results of your professional cleaning of carpets.

5. Address Spills Immediately

Spills are inevitable, but prompt action can prevent them from becoming permanent stains. When a spill occurs, blot the area immediately with a clean cloth or paper towel to absorb as much liquid as possible. Avoid rubbing, as this can push the stain deeper into the carpet fibres or spread it further. For tougher stains, use a mild cleaning solution designed for your carpet type. Always test any cleaning product on an inconspicuous area to ensure it doesn’t cause damage or discolouration. For persistent or severe stains, consider consulting a professional service for expert advice.

6. Groom Your Pets Regularly

Pets are wonderful companions, but they can contribute to carpet wear through shedding, dirt transfer, and accidents. Regularly grooming your pets minimises the amount of hair and dander that can accumulate on your carpets. Additionally, train your pets to avoid freshly cleaned carpets, especially during the drying period. Providing designated play areas with washable mats or rugs can further reduce wear and tear on your carpets.

7. Rotate Furniture Periodically

Heavy furniture can leave indentations on your carpets, especially after a professional clean when the fibres are more pliable. To avoid permanent marks, rotate your furniture every few months. This practice also helps distribute wear evenly across your carpet, extending its lifespan. For added protection, use furniture pads or coasters under the legs of heavy items to minimise pressure and prevent damage.

8. Schedule Routine Professional Cleaning

While maintaining your carpets through regular care is essential, professional carpet cleaning should still be a part of your long-term maintenance plan. Regular deep cleaning removes embedded dirt, allergens, and stains that vacuuming alone cannot address. It also helps refresh and restore your carpets, keeping them hygienic and visually appealing. Aim to schedule a professional cleaning every 12–18 months, or more frequently for high-traffic areas or homes with pets and children.

9. Avoid Eating or Drinking in Carpeted Areas

Reducing food and drink consumption in carpeted areas can significantly lower the risk of spills and stains. Encourage family members to enjoy meals and beverages in non-carpeted areas such as the kitchen or dining room. For occasions where eating or drinking in carpeted spaces is unavoidable, use trays or coasters to minimise the risk of accidents.

10. Educate Your Household

Involving everyone in the household is key to maintaining clean carpets. Teach children and guests about the importance of proper carpet care, including wiping shoes, using coasters, and promptly cleaning up spills. By promoting good habits, you can ensure that your carpets remain in excellent condition for longer.

Contact Us for Professional Carpet Cleaning

At All Care Carpet Cleaning, we specialise in professional Carpet Deep Cleaning Services Near Sydney designed to keep your carpets clean, fresh, and allergen-free. Our team uses advanced techniques and eco-friendly solutions to deliver exceptional results. Whether you need advice on maintaining your carpets or scheduling your next deep clean, we’re here to help.  

Contact us today to learn more about our services and keep your carpets looking their best.

Conclusion

Maintaining clean carpets after a professional carpet cleaning is easy with the right practices. By vacuuming regularly, addressing spills promptly, using doormats, and scheduling routine professional care, you can preserve the fresh look and feel of your carpets for years. With these tips, your carpets will continue to enhance the beauty and comfort of your home.

FAQs About Carpet Maintenance

1. How soon can I vacuum after a professional cleaning?

You can vacuum your carpets once they are completely dry, usually within 24 hours of cleaning.

2. How often should I vacuum my carpets?

Vacuum at least twice a week to prevent dirt from settling into the fibres. Increase frequency in high-traffic areas.

3. Can I clean spills with household products?

Yes, but always test cleaning products on an inconspicuous area first to ensure they won’t damage or discolour your carpet.

Published on: January 27, 2025

Hire Expert Team For Safe Carpet Cleaning In Boronia

Maintaining your carpet’s charming look is not easy when you have pets and kids at home. But don’t worry we are here to solve your problem. All Care Carpet Cleaning offers top-quality carpet cleaning services in Boronia. We thoroughly wash the carpet using the steam cleaning method and sanitise and deodorize it later.

Our carpet cleaning Boronia team has rich knowledge about different types of carpet fabric and only uses suitable and safe cleaning solutions. We make sure your carpet gets back its beautiful look, after our thorough cleaning process.

Moreover, our carpet cleaning Boronia service is available at a very budget-friendly price. So, hire us and get a cost-effective carpet cleaning solution.

    Our Carpet Cleaning Services: Perfect For All Cleaning Problems

    All Care Carpet Cleaning provides the best and most professional carpet cleaning services to all our customers at affordable prices. Our experts in Carpet Cleaning use effective and efficient methods. Here are our services:

    carpet-dry-cleaning
    Carpet Dry Cleaning
    carpet-stain-removal
    Carpet Stain Removal
    carpet-steam-cleaning
    Effective Carpet Steam Cleaning
    carpet-mould-removal
    Carpet Mould Removal
    carpet-deodorisation-odour-removal
    Carpet Deodorisation & Odour Removal
    carpet-sanitisation
    24/7 Carpet Sanitisation
    carpet-shampooing
    Carpet Shampooing
    carpet-scotchgard-fabric-protection
    Carpet Scotchgard Fabric Protection
    Call to our Experts 0488 851 508

    5 Good Reasons Why People Choose All Care Carpet Cleaning

    Here are the 5 reasons for hiring carpet cleaning professionals from us:

    1. Our professional cleaners have years of experience in cleaning carpets so they clean the carpets within a short time.
    2. The cleaning agents our professional use will help carpets to look attractive.
    3. Our professional cleaners help to lengthen the life of carpets by following proper methods while cleaning carpets.
    4. We help you to get the desired results at affordable rates.
    5. Our team is famous for its regular and emergency carpet cleaning services.

    So reach us today to book a service with us.

    all-care-carpet-cleaning

    Published on: August 24, 2022